Showing posts with label For the kids. Show all posts

Friday, March 7, 2014

Savoury Scrolls


These super easy scrolls are perfect to keep up your sleeve as a great lunchbox idea or afternoon tea.  They are quick to make, taste great, and the filling options are endless.  Here's some other ideas:
- cheese & vegemite
- pumpkin & feta
- pesto & parmesan
- custard & apple
- cinnamon & brown sugar

I'd love to hear your favourite variety!

These are super easy in a Thermomix (first recipe), but not too hard without one either (second recipe).

Ingredients
300g / 2 cups flour
50g butter
200g milk
1/2 cup tomato paste
1 tablespoon dried herbs
150g tasty cheese

Method (Thermomix)
Preheat oven to 180 degrees celsius/160 fan-forced.

Place flour and butter in Thermomix bowl and mix for 10 seconds/speed 5 until it resembles fine breadcrumbs.

Add milk and knead for 1 minute/closed lid/interval setting.

Lightly flour the bench top and turn dough out, adding more flour if too sticky.

Roll out into a large rectangle (about 30cm x 40cm) and spread with tomato paste, then sprinkle with herbs & cheese.

Roll it up into a long sausage and slice into 12 even slices.

Grease a muffin pan and put each scroll into a hole.  Bake for about 30 minutes, until lightly browned and has a hollow sound when tapped.


Method (standard)
Prehehat oven to 180 degrees celsius/160 fan-forced.

Place flour and butter in a large bowl and rub together with finger tips until it resembles fine breadcrumbs.

Add milk and stir to combine, then knead until it comes together into a soft dough.

Roll out into a large rectangle (about 30cm x 40cm) and spread with tomato paste, then sprinkle with herbs & cheese.

Roll it up into a long sausage and slice into 12 even slices.

Grease a muffin pan and put each scroll into a hole.  Bake for about 30 minutes, until lightly browned and has a hollow sound when tapped.

Monday, February 24, 2014

Brown Rice Tuna Cakes


Here's a perfect, healthy, budget lunchbox or picnic idea - enjoy!


Ingredients
1 1/2 cups cooked brown rice
3 eggs, lightly beaten
1 carrot, grated
1 zucchini, grated
1/2 brown onion, chopped finely
1/2 cup corn kernels
1/2 cup parmesan cheese
1/2 cup tuna, drained and broken up
1/2 cup milk
fresh or dried herbs, to taste

Method
Preheat oven to 180 degrees celsius/160 fan-forced.

Combine all ingredients in a bowl.

Spray a 12-hole muffin pan with oil, or 24-hole mini muffin pan (or you can even do one big one!)

Divide mixture between holes.  Bake for 20 minutes for mini size or 30 minutes for larger size, until set and golden brown.

Serve warm or cold.

Monday, February 17, 2014

Cupcakes


This is one of those basic recipes that you need on hand, especially when you're a mum!  These cupcakes turn out perfectly every time and are always a hit with the kids :-)  This recipe makes 2 dozen.

Ingredients
200g butter, softened
1 teaspoon vanilla extract
1 cup caster sugar
3 eggs
3 cups self-raising flour
1 cup milk

Method
Preheat oven to 180°C/160°C fan-forced oven. Line 2 muffin pans with paper cases.

Beat butter, vanilla and sugar until light and fluffy. Add eggs, 1 at a time, beating after each addition.

Mix in half the flour on low speed, followed by half the milk, then repeat.

Divide mixture evenly between pans. Bake for 18 minutes, until cooked through and lightly browned.

Transfer to a wire rack to cool.

Buttercream
150g butter, softened
3 cups icing sugar mixture
2 tablespoons milk

Method
Beat butter in a bowl until pale.

Gradually add icing sugar mixture and milk, beating constantly until combined.  Add colour if desired.

Spread cooled cupcakes with icing and decorate.

Monday, February 3, 2014

Savoury Pinwheels


Ingredients
400g lean beef mince
2 carrots, grated
1/2 cup baby spinach, finely chopped
1/4 cup fresh herbs, finely chopped
1 tablespoon tomato paste
1 egg, beaten (split use)
1 sheet puff pastry, defrosted
1/4 cup parmesan cheese, grated

Method
Preheat oven to 200 degrees celsius/180 fan-forced.

Combine mince, carrot, spinach, herbs, tomato paste and half the egg in a small bowl.

Spread out on the puff pastry, pushing to the bottom and side edges, but leaving a 2cm gap at the top.

Sprinkle with parmesan.

Brush top edge with a little of the remaining egg.  Roll up tightly from the bottom to form a long log.

Slice into 12 even rounds.  Place on a lined baking tray and bake for about 25 minutes, until mince is cooked and pastry is golden brown.


Monday, October 28, 2013

Risotto Balls


Risotto Balls are the ultimate recipe for repurposed leftovers.  It's the perfect way to reinvent your dish and not get bored with the same meal two nights in a row.  The good thing about risotto is that the flavour options are endless, which means it's the same deal for these little delights too.

Most risotto balls are deep fried, but I wanted the oven-baked option so it was a bit healthier.  The kids LOVED the cheese surprise in the middle and they were a delicious Sunday night almost home-made takeaway kind of meal.  Enjoy!


Ingredients (makes 12 balls)
1/2 batch risotto (try this Leek & Bacon Risotto or this Pumpkin Risotto), cooled
12 small cubes cheese (you can use tasty, mozzarella or bocconcini)
3/4 cup plain flour
2 eggs, lightly beaten
1 cup breadcrumbs
1 teaspoon dried herbs
olive oil spray

Method
Preheat oven to 180 degrees fan-forced.

Place plain flour, eggs and breadcrumbs (mixed with herbs) in separate, shallow dishes.

With wet hands, take large handfuls of risotto.  Place a cube of cheese in the middle.  Roll in flour, then egg, then breadcrumbs.  Place on a lined baking tray.

Repeat for the rest of the risotto to make 12 balls.  Lightly spray with oil.

Bake for 20 minutes until golden and crunchy on the outside.

Friday, October 18, 2013

Bagels


Bagels are not something I'd really thought of trying until recently.  I got my bake on a couple of weekends ago and it was a pretty good result!  They were probably a bit more dense than I'd have liked, but overall they tasted good, and were a great variation to our usual lunches.

And of course, now that a couple of weeks have passed, I can't even remember which recipe I used, so I'll just link to a few here and you can have a look for yourself.  They are so delicious freshly-baked and always remind me of holidays overseas for some reason.

Let me know if you try them out!

http://www.sophisticatedgourmet.com/2009/10/new-york-style-bagel-recipe/

http://www.taste.com.au/recipes/22378/poppy+seed+bagels

http://www.taste.com.au/kitchen/articles/making+homemade+bagels,340

http://www.thefreshloaf.com/recipes/bagels


Wednesday, October 2, 2013

Healthy Cheesy Fish Fingers


I rarely do a separate meal for the kids - I just don't have the time to be cooking multiple meals each night!  But hubby & I were having simple herb & garlic baked fish with steamed veges and I didn't think the kids would be too keen.  So I whipped these up and they got devoured!  You can use any veges you want and you can also make them into any shape, or even bake them in muffin pans or the like.  Get creative!  These are infinitely better than store-bought "fish" fingers (who knows what's actually in them?!?) - so get cooking!


Ingredients
150g firm white fish fillets (I used basa)
1 cup cooked, chopped vegetables (can use frozen or fresh)
1 egg
1/2 cup grated cheese
2 teaspoons fresh/dried herbs
1 cup breadcrumbs (adjust according to consistency)

Method
Place fish and vegetables in a food processor and process until smooth.  Add egg, cheese, herbs and breadcrumbs and mix until combined.

Shape into logs and place on a tray lined with baking paper.  Bake at 180 degrees Celsius for about 7 minutes, then turn over and bake for another 7 minutes.

OR

Spray a frying pan with olive oil spray and pan-fry logs for a few minutes each side until golden-brown and cooked through.

Monday, September 30, 2013

Almond Butter Biscuits


This is a recipe I adapted from a 4 Ingredients book and I love that it's so easy and gluten free.  The original recipe uses peanut butter, but it was just as good with almond - or any nut butter would do!

I used whole almonds from Charlies and made them into a butter with my neighbour's Thermomix - but you could just buy it (go for the natural stuff from the health food section of the supermarket).


Ingredients
1 cup (250g) almond butter
3/4 cup (220g) brown sugar
1 teaspoon cinnamon
1 egg

Method
Preheat oven to 180C. Mix all ingredients into a bowl.

Spoon small tablespoon sized balls onto 2 lined baking trays. Flatten slightly.

Bake for 8 minutes, or until a thin crust forms on the biscuit.  Cool and enjoy.

Friday, September 27, 2013

Cake Balls


I was going through my freezer the other day, when I came across a container full of leftover Fire Truck Birthday Cake  from my little man's birthday last month.  Leftover birthday cake is so delicious, but you can't really serve a deconstructed cake - and my tummy & thighs certainly don't need the extra calories!

So I came up with this - and it was soooo delicious!  Because of the red fire truck icing, the balls came out such a beautiful rich red colour - but you could always add some colour if you just have plain leftover cake.  You can also experiment with the flavour, or just leave it as it.

Ingredients
leftover cake, iced with buttercream
1 teaspoon strawberry essence (or any other flavour - or if your cake is flavoured, just leave it as is)
100g dark chocolate, melted
sprinkles, for decoration

Method
If frozen, defrost the cake.  Place chunks into a food processor or Thermomix and process until fine crumbs form.  Add essence.  Continue to process until mixture comes together in a big ball and is quite moist.

Roll tablespoonfuls of mixture into balls.  Assess the texture and if necessary, place in freezer for about 30 minutes.

When mixture is firm, dip in melted chocolate, sprinkle with decorations and refrigerate until set.

Thursday, September 12, 2013

Kids Food Ideas #3


I needed another change from the cheese sandwich that my kids would so happily eat every day, so today I threw these fritters together:

1 grated zucchini, 1/2 cup grated cheese, a few slices of leftover corned beef (chopped), 1/4 cup tinned corn, 1 egg, 1 cup SR flour, 1 cup milk - mix together, and dollop into a frying pan over medium-low heat, cook for about 2 minutes each side, until cooked through. 

It was a winner!

Here's some other ideas for the lunchbox: (as well as more in previous posts here and here!)

Rice cakes instead of the usual sandwich, with a range of toppings to mix it up.
I love when the snack box has lots of bright colours - it definitely makes it much more appealing for the kids!  Shown here are mulitgrain rice crackers, dried cranberries, carrot & strawberries.
I love these Tupperware lunchboxes - you can fit so much in, while only taking one container with you (and no excess packaging).  Again, lots of bright colours always go down a treat!
Sometimes making it into a funny shape is enough to get them eating healthily!  Daggy mum, I know :-)
Melted cheese on a wrap to make a quesadilla, accompanied by colourful silicone cups with a range of salad items.
So get a bit creative and mix up your lunch today!

Friday, September 6, 2013

Puffed Rice Slice


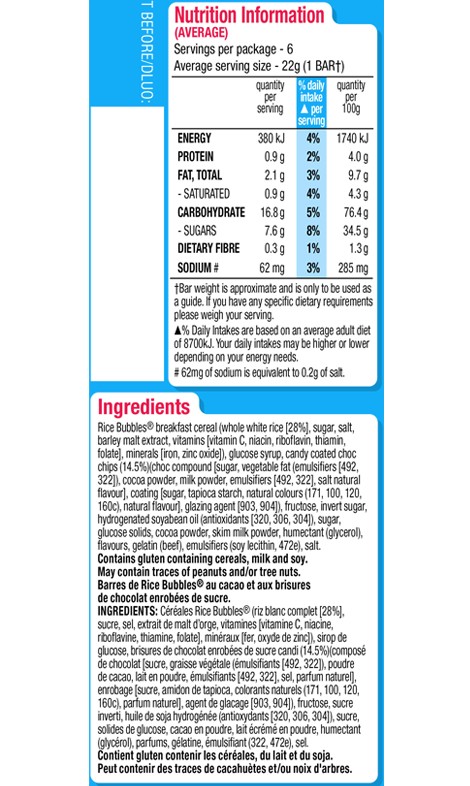
You know those rice bubble bars you buy at the shops?  Sure they're convenient for the lunchbox, but have you ever actually looked at what's in them?  Hopefully you can zoom in enough to see the ingredients list:


Yep, absolutely filled with unnecessary extras.  When you realise how easy it is to make your own, you won't need to buy them any more!  It'll save you heaps of money, heaps of plastic packaging & takes hardly any time at all.  These keep well in the fridge and are also suitable to freeze, so you can always have them on hand.  You can get puffed rice in the health food section at the supermarket - it's better than rice bubbles, because the only ingredient is rice!  You'll love these ones :-)

Ingredients
100g butter
1/2 cup caster sugar
2 tablespoons honey
100g puffed rice
1 teaspoon vanilla extract
1/2 cup desiccated coconut

Method
Combine butter, sugar and honey in a bowl and microwave for 2 minutes, until butter is melted OR combine in a small saucepan.

Add puffed rice, vanilla and coconut and mix well.

Pour into a lined slice tin and refrigerate until firm.

Cut into slices and serve.  Keep in the fridge.

Thursday, August 15, 2013

Fire Truck Cake


My gorgeous little man turns 2 this week - how did that happen?!  Seriously, it feels like he was just born the other day!

He is a stereotypical little boy through and through - he loves anything with wheels.  Cars, trucks, tractors, motorbikes, planes...you name it!  So for his 2nd birthday, he requested a fire truck cake.

There's no fire truck in the good old Women's Weekly Kids' Cake Book, so I turned to the internet for inspiration.  I gathered ideas from here and there, and was really happy with the end result.

It's certainly not as professional as many you see (namely, the fondant ones!) - but my heart lies with butter cream icing, so that was my weapon of choice!

I baked the cake and made the icing the day before, so when I came to actually create the fire truck, it only took me just over an hour.  It was pretty straightforward really, so I'll take you through it step by step!

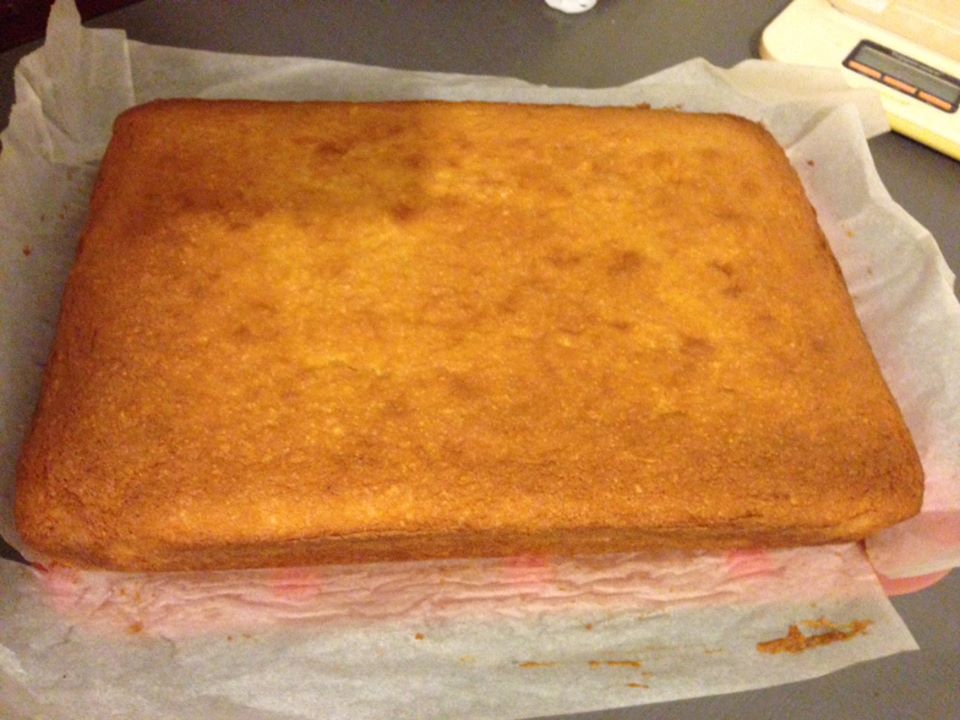
Start with a slab cake.  I used Women's Weekly Butter Cake (triple recipe) - I used my deep roasting pan which is about 40cm x 30cm.


Level the top, then cut into half length-ways, to have two long rectangles.

Place one on a cake board.  Cut the other into halves, then one of those into halves again.  Arrange into fire truck shape, as below (use a bit of icing in between each part to help it stick in place).


Make a double batch of buttercream.  Tint two thirds red (I used pillar box red).  Split the rest in half, keep one part white and tint the other part grey (using black food colouring).

Ice as shown.


Decorate as desired.  I used chocolate biscuits, red & orange jelly lollies, licorice rolls, smarties and white buttercream.


Put in the candles and enjoy!


The happiest little birthday boy you'll ever see :-)

Tuesday, August 13, 2013

Banana Oat Biscuits (& photoshoot sneak peak!)


 This recipe is courtesy of Maria, my workmate's wife, who saved the day last week.

The radio station I work for, 96five, is doing a giveaway for the duration of the Ekka, of a "Mums In the Kitchen Showbag".  It includes an apron, oven mit, tea towel, shopping list, radio and Romeo the Radio Dog toy - pretty cool!  So, we had a photo shoot last week to showcase the showbag.


We were doing the shots with the oven...but had an empty tray!  Thankfully, Maria had sent her husband to work with some freshly-baked biscuits, so we were able to use them for the shoot :-)  They also taste great!

Tune in to 96five for your chance to win a Mums in the Kitchen Showbag!


Ingredients
150g butter, softened
1 cup packed brown sugar
1 egg
1/2 cup mashed ripe banana
1 teaspoon vanilla extract
1 cup plain flour
1/2 teaspoon baking soda
1 teaspoon salt
1 teaspoon ground cinnamon
1/4 teaspoon ground cloves
3 cups rolled oats
1/2 cup chopped walnuts
Method
Preheat oven to 350 degrees F (175 degrees C). Line baking trays.

In a large bowl, cream together butter and brown sugar. Beat in egg and mashed banana, then stir in vanilla.

Combine flour, baking soda, salt, cinnamon, and cloves; stir into the banana mixture. Mix in rolled oats and walnuts. 

Drop by rounded spoonfuls onto prepared trays. Leave room for spreading. 

Bake for 8 to 10 minutes in preheated oven. Allow cookies to cool for 5 minutes before transferring to a wire rack to cool completely.


Sunday, August 11, 2013

Clown Cupcakes & Ekka Results


It's Ekka time again - one of my favourite times of the year!  For those not in Brisbane, it's the Royal Queensland Show.  I love going to the show and getting in the spirit of it!  Nothing can keep me away from the Ekka - not even 2 years ago when I was 39 weeks pregnant!

We had an Ekka theme at our Mainly Music group this week, and I had some cupcakes leftover from the Pine Rivers Show, so I decided to make them into these cute clowns!  I just used plain buttercream icing on top, and secured the ice cream cones upside down.  I tinted the leftover buttercream red, yellow & blue and just piped on the faces and hat decorations.  They were very popular with the kids!

And as revealed on my Facebook page, I entered two categories in the Ekka baking competition this year - carrot cake and red velvet cupcakes.  Here they are, ready to submit:

And the exciting news is, I came 2nd in the red velvet cupcakes!  Hooray!  It was very exciting to go and check them out :-)

It's one better than the 3rd place I got for carrot cake 2 years ago, so next year, I'll be pushing for a first!

Also, here's the link to my Ekka treats from last year (Strawberry Icecream Cupcakes) - they were a super popular post, so check it out!

Hope you're having a great day in the Kitchen!

Friday, August 2, 2013

Rainbow Pasta


I was recently at a deli with the family and Miss 3 was quite fascinated by some colourful pasta we saw.  But it was super expensive, and of course I told her I could make it for MUCH cheaper than that. So I did!

Now first of all, I have to put out a disclaimer that this is a Thermomix recipe.  I have been lucky enough to borrow my neighbour's machine a bit recently, and WOW!  I'm super impressed!  Things like breads and doughs are so easy, I've also loved making soups, batters, jams and so much more, this thing really is amazing.

Anyway, pasta dough was soooo easy in the thermo.  And it was really easy to blend up the colours with it.  Of course, you could always do it by hand or in a food processor.

I found the actual rolling out of the dough fairly time consuming, and I wished I had another pair of hands (and the kids lost interest pretty fast!)  I borrowed my mum's pasta maker, and the rollers are just not very sharp, so I had a bit of trouble trying to separate my strands.  But despite those technical issues, I loved the result!

I love that it was coloured with vegetables, with no added nasties, and I kept it super simple, just mixing through a home-made pasta sauce (in the Thermomix of course!) and sprinkling with parmesan cheese to serve.

It was a big hit, and this recipe made HEAPS!  If I was to make pasta again, I'd do it on the weekend, when I have more time and/or some help, because it would make the process a whole lot easier.

Anyway, the kids love it - give it a go!

(You know you'll vegetables will be fresh & bright for that natural colour if you get them from Charlie's)


Ingredients (serves 6-8)
150g pumpkin, roasted
100g frozen spinach, thawed, with excess water squeezed out OR fresh spinach, steamed & drained
4 baby beetroots, roasted & peeled
3 eggs
300g baker's flour, plus about 200g extra
1 tablespoon olive oil

Method
Place the pumpkin in the thermomix bowl with 1 egg.  Mix for 10 seconds/speed 8.  Scrape down the sides, and mix for a further 5 seconds/speed 8.

Add 100g of the flour, along with 1/3 of the oil and mix 15 seconds/speed 5.  Check the consistency - because of the added vegetables, you'll probably need to add more flour.  You don't want the dough too sticky, so don't be shy about adding more flour.  It shouldn't be sticky to touch.  Knead for 2 minutes (use the kneading function).  Remove from bowl and wrap in cling wrap.

Wash the bowl and repeat the process with the spinach, then with the beetroot.

Let the dough rest for about 30 minutes (or you can leave it in the fridge for a few days).

Divide each colour into 4 balls.  Pass through a pasta machine until thin, then through the spaghetti or fettuccine function.  Again, add more flour if necessary - sticky pasta will go gluggy.  As you can see in the photo below, I put a broom between two chairs and hang the pasta over as I go.


Bring a large saucepan of salted water to the boil.  Drop in the pasta, in batches (stick to one colour at a time so it doesn't run).  Cook for about 2 minutes or until al dente (fresh pasta doesn't need long!)

Drain and toss together when it's all cooked.  Stir through a pasta sauce, sprinkle with parmesan cheese and serve.


Friday, July 26, 2013

Echidna Balls


This recipe epitomizes family-friendly, easy, cheap, healthy and delicious meals!  It's from the 4 Ingredients Kids book and will definitely be made again in my house!


Ingredients (serves 4)
400g beef mince
1 egg, beaten
1/2 cup cooked white rice
400g can condensed tomato soup

Method
Preheat oven to 180 degrees celsius.  In a bowl, combine the beef, eggs, rice and season with salt and pepper to taste.

Mix well and form into 4cm diameter meatballs.  Place in a large baking dish and cover with the soup.

Swirl 1/4 cup of water in the can, add this liquid to the meatballs.  Bake for about 45 minutes, or until the mince is cooked through.

Serve with steamed vegetables.

Friday, April 26, 2013

Cauliflower Pizza Base


A big thanks today to reader Karen Howarth, who told me about the idea of a cauliflower pizza base.  It might sound a little strange, but it's definitely worth a go!  It's easy to do, takes less time than sitting around waiting for your yeast dough to rise, and is completely gluten-free.  And it's surprisingly tasty!  You can add any of your favourite toppings.  Mine wasn't quite as firm or crisp as I would've like, so next time I'll try making it on the pizza stone, as opposed to my silicone baking mat on a tray.  Try and mix it up for your next Pizza Night!

All of the delicious veges used in this recipe are from Charlies Fruit Market :-)

Ingredients
1 small head cauliflower, chopped
1 clove garlic, crushed
1.5 cups grated cheese
1 egg
2 teaspoons dried herbs
pizza toppings (I used a tomato paste/home-made tomato sauce base, along with roast pumpkin, red onion and capsicum, crumbled feta and fresh basil)

Method
Preheat oven to 200 degrees Celsius.

Place cauliflower florets in a food processor and "rice" until it is finely chopped.  You could also grate it.

Transfer to a frying pan/wok/saucepan, add garlic and saute for about 8 minutes, until tender.

Let it cool slightly and add cheese, egg and herbs, and mix well.

Turn onto a tray lined with baking paper, or a well-floured pizza stone.  Form into an 8-inch circle.  Bake for about 20 minutes.

Spread with tomato paste, then place toppings on.  Bake for another 10 minutes.  Serve.

After baking the base

Ready to go in the oven!

Print