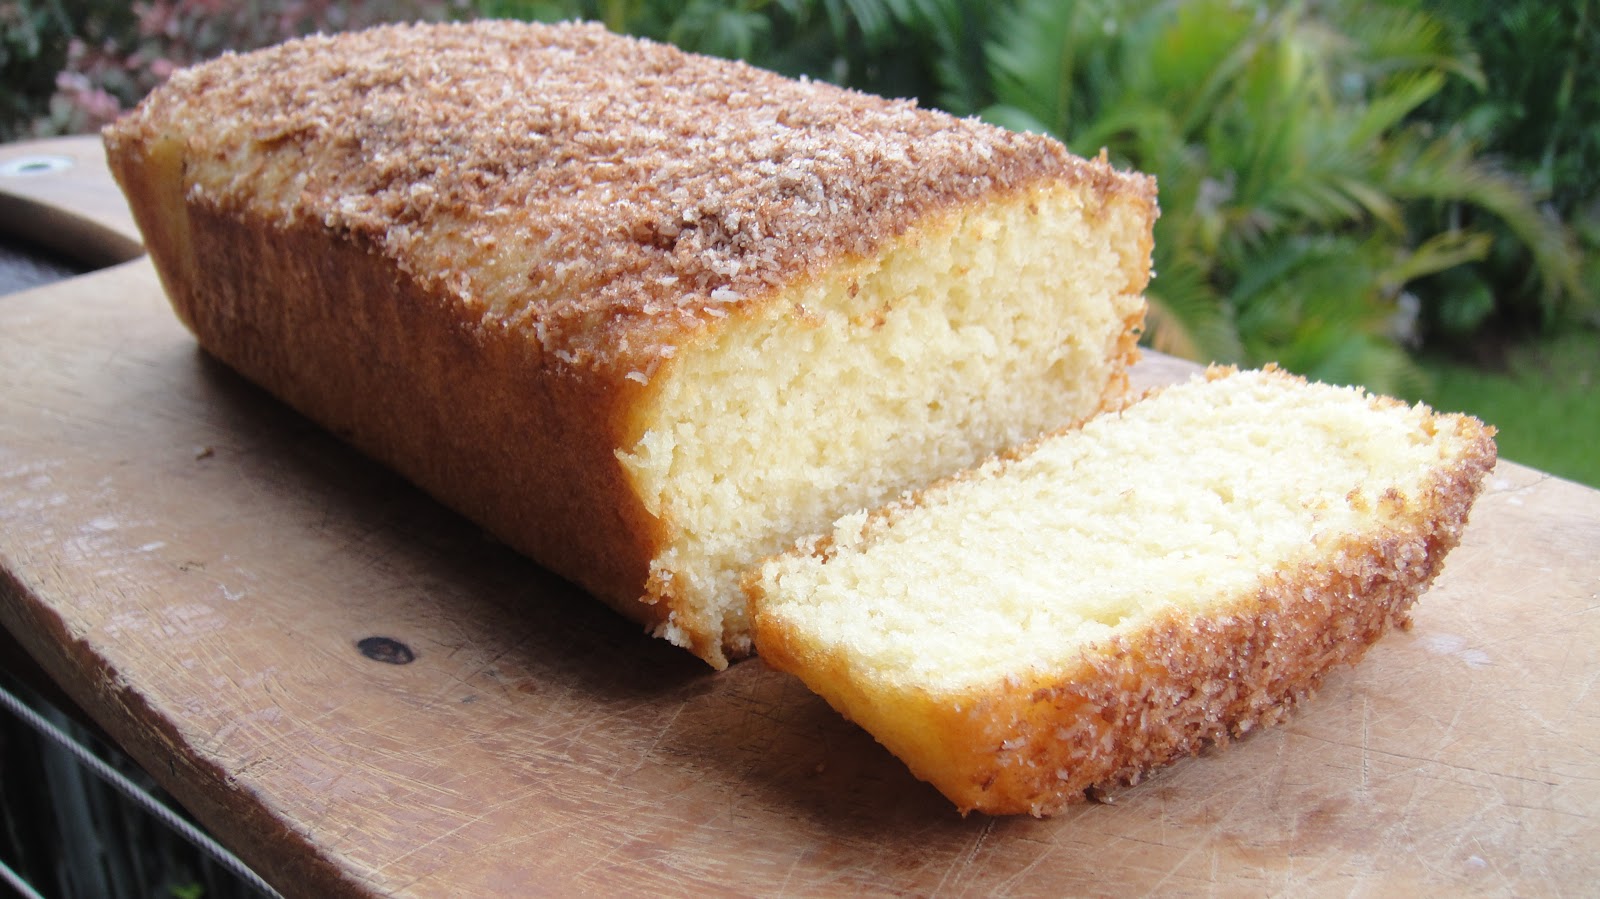
Tuesday, April 2, 2013
Upside-Down Apple and Walnut Cake
This is a perfect afternoon tea cake that I was quite pleasantly surprised with. Cakes cook so much faster in the microwave than the oven, so it's perfect if you're pressed for time. I thought it would come out a bit dry being microwaved, but I found the caramel topping made it nice and moist. It's perfect served with some extra walnuts sprinkled on top!
Ingredients
Melted butter, to grease
160g butter, at room temperature
200g (1 cup, firmly packed) brown sugar
1 300ml container thin cream
2 apples, peeled, halved, cored, cut lengthways into thin slices
1 tsp vanilla essence
2 eggs, at room temperature
225g (1 1/2 cups) self-raising flour
1 tsp ground cinnamon
55g (1/2 cup) walnut halves, chopped
Method
Brush a 7cm-deep, 20cm (base measurement) microwave-safe ring container with the melted butter to lightly grease. Line the base with non-stick baking paper. (I used my Tupperware Kugelhopf and greased it with butter but didn't line it).
Combine 60g of the butter, 100g (1/2 cup, firmly packed) of the sugar and 2 tbs of the cream in a medium, heatproof microwave-safe bowl. Heat, uncovered, on High/800watts/100%, stirring every minute, for 2 minutes or until the sugar dissolves and the sauce is smooth. Set aside.
Spread the apple slices over a large microwave-safe plate so they are no more than 2-3 deep. Cover with plastic wrap and cook on High/800 watts/100% for 1-2 minutes or until just tender when tested with a skewer. Drain any excess moisture from apples and then gently stir apples into caramel sauce. Spread apples and sauce evenly over base of ring container.
Place the remaining butter, remaining sugar and vanilla essence in a medium bowl. Use an electric beater to beat on high speed until well combined. Use a wooden spoon to mix the eggs in, 1 at a time, until well combined.
Sift the flour and cinnamon together into a bowl. Use the wooden spoon to gently stir the flour mixture and 60ml (1/4 cup) of the remaining cream into the butter mixture in 2 batches. Add walnuts and stir gently to combine. Spoon mixture evenly over the apple mixture in the ring container.
Place the container on a microwave-safe rack or upturned plate to elevate it about 2cm above the microwave turntable. Cook, uncovered, on Medium/500watts/50% for 9-10 minutes or until the cake looks cooked but the surface (in the centre) is still a little sticky. Stand for 5 minutes or until a skewer inserted into the centre of the cake comes out clean.
Meanwhile, lightly whip the remaining cream until soft peaks form.
Turn the cake onto a serving plate. Serve warm or at room temperature with the whipped cream.
Monday, April 1, 2013
Healthy Ice Creams
I love this healthy alternative to a tub of ice-cream and the kids do too! I've been meaning to post it for ages and realised I better do it before winter hits! It's the perfect way to use up fruit that might just be nearing its use-by date - or any fruit that you've popped in the freezer for the same reason. You can scoop it straight into bowls or ice cream cones (as above), or into ice block moulds ready for later :-)
Experiment with a few fruit combinations - you won't be disappointed!
Ingredients
1 cup fresh or frozen fruit (approx) - I love using banana & mango
1/2 cup natural low-fat yoghurt
1/2 teaspoon cinnamon
honey (optional)
Method
Combine ingredients in a blender or food processor. Pour into ice block moulds. Freeze overnight.
Friday, March 29, 2013
Healthy Easter: Low-Fat Hot Cross Buns
To close out the week of Healthy Easter Treats, I decided to have a crack at some Hot Cross Buns. My standards of home-made HCBs are extremely high, considering both my mum and mother-in-law are exceptional Hot Cross Bun-makers. They simply have their recipes down pat and are always generous in feeding us a constant supply in the lead-up to Easter. Yes, I consider myself very fortunate!
So, I decided to give my own batch a crack for the first time in a few years. My last attempt was pretty unsuccessful, but I've had a lot of practice using yeast since then, so I thought it couldn't be too hard. I got this recipe from the Lose Baby Weight website. I was happy with the recipe, but a bit disappointed with my buns, as I felt they didn't rise enough on the second go. Compared with Shirley's, mine seemed small and dense :-(
However, the flavour was pretty good, plus they are low-calorie, so there is comfort in knowing that!
I've already booked myself in for a HCB workshop with my mums for next year, so hopefully then I can bring you another amazing recipe!
Makes around 15 buns with each bun being approx 110 calories
Ingredients
400g wholemeal flour
½ teaspoon mixed spice
50g reduced fat butter
40g mixed dried fruit
2 teaspoons dry yeast
1 teaspoon Natvia natural sweetener
200ml water
Crossed dough ingredients
3 tablespoons plain flour
2 tablespoons honey
2 tablespoons water
Glaze
2 tablespoons honey
2 tablespoons boiling water
Ingredients
400g wholemeal flour
½ teaspoon mixed spice
50g reduced fat butter
40g mixed dried fruit
2 teaspoons dry yeast
1 teaspoon Natvia natural sweetener
200ml water
Crossed dough ingredients
3 tablespoons plain flour
2 tablespoons honey
2 tablespoons water
Glaze
2 tablespoons honey
2 tablespoons boiling water
Method
Preheat oven at 200 degrees.
Mix yeast and natvia with 150ml of water.
Mix the dry ingredients together (flour, mixed spice, dried fruit).
Make a well in the centre of your dough. Then pour in the yeast mixture, 50ml of water and the butter
Knead the dough for about 5 minutes and then cover it, leaving it to rise for 1 hour.
After 1 hour, cut the dough into balls and then leave them to rise for another 20 minutes or until the size doubles.
Whilst waiting for the dough to rise, prepare your crossed dough mixture in a mixing bowl and put it into a piping bag.
Then, pipe it onto the dough balls in a cross shape before you pop it in the oven.
Bake for 20 minutes.
Once it’s done, take it out of the oven and glaze it!
Thursday, March 28, 2013
Healthy Easter: Chicken Eggs
Healthy Easter treats continue and this one is sure to be a hit with the kids! It's so easy, super healthy and is a perfect addition to the Easter table. These eggs were lovingly laid by our own family chickens, Princess Layer, Chewy & Vadar - see how bright the yolks are!? Freshly laid, free range eggs really are the best!
If you don't have them roaming your backyard, you can always get them from Charlies!
Ingredients
6 eggs
1/4 carrot, thinly sliced
6 sultanas
Method
Hard boil the eggs in a saucepan of simmering water. Allow to cool, then peel the shells away.
Slice a small section of white off each end (so it will sit flat on the plate), then slice each egg in half cross-ways.
Use the yolk as your chicken face and decorate with small triangles of carrot and sultanas.
| Hope thought they were pretty good! |
Wednesday, March 27, 2013
Thai Beef & Rice Noodle Salad
Firstly, I have more exciting news to share - a new partnership with a local business called Deagon Bulk Meats. They are a fabulous family-owned business, who sell quality meat and great prices. I'll be showcasing some of their great products and it's a win for you, because if you mention Mums in the Kitchen, you can get a special deal on the meat used in today's recipe! They're offering 800g of beef strips for $8, if you mention this blog in store, between now and next Tuesday.
So, onto the recipe...I adapted this from Super Food Ideas. I LOVE Thai food and the flavours in this are divine! The textures of the crispy vegetables (from Charlie's Fruit Market) and soft rice noodles complement perfectly, and when you add in the tender beef - it's just delicious! You'll enjoy this one!
Ingredients (serves 6)
Nam Jim Dressing:
2 long green chillies (I used mild ones for the kids)
2 garlic cloves, quartered
2 spring onions, chopped
1 tablespoon lime juice
2 teaspoon coconut oil
1 tablespoon fish sauce
1 tablespoon palm sugar or brown sugar
1/4 cup chopped fresh coriander leaves
Salad:
200g dried rice stick noodles
800g beef strips
olive oil spray
1 green capsicum, cut into matchsticks
1 carrot, cut into matchsticks
2 green onion, thinly sliced
1 cup fresh coriander leaves
Method
Cook noodles in a medium saucepan of boiling water for about 6 minutes, or until tender. Rinse under cold water.
Heat a frying pan over medium-high heat and spray with olive oil. Cook beef until browned.
Place noodles in a bowl with capsicum, carrot, onion, coriander and half the nam jim dressing. Combine.
Top with beef and remaining dressing. Serve
Healthy Easter: Raw Choc Coconut Balls
These raw little chocolate treats are pretty amazing. Not only do they actually taste great, but they are also gluten-free, dairy-free, refined sugar-free and egg-free. Amazing! Even my husband, who was pretty sceptical of the raw chocolate, really enjoyed these!
The chia seeds are a fantastic addition for crunch and for health benefits. These are a wonderful Easter treat that are quick and easy to make, and won't give you the guilts!
Get your nuts & dried from Charlie's!

Ingredients
1 cup cashews
1/2 cup unsweetened desiccated coconut, plus extra for rolling
1/4 cup chia seeds
4 tablespoons raw cocoa powder
3 tablespoons raw peanut butter
1/2 cup unsweetened dried fruit (eg apricots, dates, raisins)
1/2 teaspoon vanilla extract
3 tablespoon melted coconut oil
1/2 tablespoon maple syrup
Method
Place cashews in a food processor and process until finely chopped. Add coconut, chia seeds and cocoa powder and pulse until combined.
Add remaining ingredients and process until combined.
Roll heaped teaspoons of mixture into balls and roll in extra coconut. Refrigerate.
Tuesday, March 26, 2013
Healthy Easter: Rice Cake Scenes
To continue with the week of Healthy Easter Treats, I was thinking about how I could use my Easter biscuit cutters for good and not evil! In the past, I've often made sugary, fatty biscuits, spread them with white chocolate and covered them with sprinkles - not one for the health-conscious!
So, I decided to do some cheese cut-outs, and these just evolved from there! You can get as creative as you like. The kids love it, whether they're involved in the decorating, or just the eating. They are a bit fiddly, but less time-consuming than making and icing a batch of biscuits - and way healthier!
Ingredients
Rice cakes
Cheese from a block
Sliced ham
Sultanas
Dried apricots
Cucumber
Capsicum
Fresh parsley or coriander
Mayonnaise
(or anything else you have in the fridge/pantry!)
Method
Cut out Easter shapes from the cheese. Cut ham with a scalloped round cutter, just smaller than the rice cake.
Layer ham and cheese on the rice cakes, then decorate as desired, using small dabs of mayonnaise to attach vegetables.
Monday, March 25, 2013
Healthy Easter: Guilt-Free Chocolate
Easter is just around the corner and it really is a time laden with sugar, fat and generally very unhealthy treats. So this week, I'm endeavouring to bring you super-healthy Easter alternatives, to prove that you can celebrate this time of year without putting on 10kg!
To kick it off today, I'm sharing a recipe I based on one from Spark Recipes. It is a paleo recipe, using raw ingredients. The taste is not like your standard Easter egg - it is a bit more bitter and definitely not as sweet, but if you think of it as a twist on a Coconut Rough, it really is quite pleasant! I also find it satisfies that sweet craving, but doesn't make you want to binge on it.
I like this recipe as it isn't full of really expensive, very "out-there" ingredients - most things you will probably have on hand. My chocolate-loving kids ate these up, but my sweet-tooth husband wasn't so keen! Another note, I got my Easter chocolate molds from a $2 shop a couple of years ago - always handy to have!
You can also add some variety by putting in chopped nuts (like cashews or macadamias), or dried fruit (preferably something like dates with no added sugar). Enjoy!
PS Did you know Charlie's Fruit Market sell nuts & dried fruit?!?
Ingredients
4 tablespoons coconut oil
1/4 cup unsweetened cocoa powder
1/2 cup ground almonds
3/4 cup unsweetened coconut
1 tablespoons maple syrup or honey
1 tablespoon raw peanut butter (optional)
Method
Mix the dry ingredients together. Blend together coconut oil and maple syrup, then combine all until mixed well.
Press into chocolate moulds (or a silicone mini-muffin pan) and chill for 30 minutes.
Optional: put 1/2 teaspoon peanut butter in between layers of chocolate.
Friday, March 22, 2013
Mushroom Paste
This is a fascinating recipe that I made a little while back after being given a few boxes of mushrooms. It was the perfect way to use up a heap before they went slimy. This preserve really highlights the mushrooms' natural flavour and can be used mixed through pasta, on a pizza, as part of a savoury snack (like on dry biscuits with cheese) or anything else you can think of! It's a really unique flavour, but it totally works! I made a few changes to the recipe (taken from Simon Bryant's website), but I've given you the original here. Let me know how you go!
Ingredients
1 cup dried porcini
2 tablespoons extra-virgin olive oil
4 shallots, diced
3 sprigs fresh oregano and fresh thyme
4 Portobello mushrooms, 2mm diced
6 fresh shiitake mushrooms, 2mm diced
6 button mushrooms, 2mm diced
4 Swiss brown mushrooms, 2mm diced
2 cloves garlic, finely chopped
1 tablespoon salt
½ cup dry white wine
50ml red wine vinegar
Extra virgin olive oil for covering top of jar at the end
Method
Soak the dried porcinis in a bowl of warm water. Let sit for 20 minutes or until they are soft. Strain through a fine sieve reserving the liquid, squeezing out the juice. Chop finely.
In a large sauté pan, heat the olive oil until warmed. Fry the shallots and stir until fragrant, add the porcini, stir then add the fresh herbs and garlic. Continue to stir then add all the mushrooms and sauté until cooked adding “a bucket load of salt”. It takes quite a lot of time to really cook out. Deglaze pan by adding white wine then red wine vinegar and continue to cook until evaporated. Add the reserved porcini liquid and reduce until liquid has evaporated.
Remove from heat and pour into sterilized jars, (these can be sterilized in the oven) let settle to get the air pockets out (knock the jar on the bench to help it along). Top with the extra oil and seal while hot making sure that the jar is full to the top. This should keep about 3 months in the fridge.
Perfect to use on bruschetta, in pasta sauces topped with a little grated parmesan and basil, or tossed through warm potatoes, in risotto, or as a base for pizza.
Thursday, March 21, 2013
Gluten Free & Dairy Free Chocolate Pear Cake
Lately I've been trying more intolerance-friendly recipes, and the results have been surprisingly good! People who can't have things like wheat and/or dairy, really do appreciate when you go to that bit of extra effort and cater for them. It can't be easy being restricted in what you can have! I found this cake so simple to make, and didn't even bother with an icing as the apples made it so moist. It was a huge hit and amazingly easy!
Ingredients
425g can apple pie fruit (or 6-8 apples, peeled, cored, chopped & stewed)
1/4 cup (60ml) water
1 tsp bicarbonate soda
125g non-dairy spread
1 cup (220g) caster sugar
1 tsp vanilla
2 cups (300g) gluten-free self-raising flour
2 tbs cocoa
Method
Preheat oven to 180°C. Grease a 20cm cake pan and line base and sides with non-stick baking paper.
Place apple, water and soda in a small pan over low heat until soda starts to bubble, remove from heat.
Beat spread, sugar and vanilla in a medium bowl with an electric mixer until light and fluffy. Stir in combined sifted flour and cocoa. Fold in apple mixture.
Spread mixture into prepared pan and cook for about 40 minutes or until cooked when tested with a skewer. Cool on a wire rack.
Wednesday, March 20, 2013
Banana Blueberry Yoghurt Muffins
This is a great way to use up any bananas that are getting a bit soft. This mini-muffins are a great little snack or to take along to a shared morning tea. It's so easy for the kids to get involved with the stirring, or popping the blueberries on top, which my little helpers did :-) I added the white chocolate option, and definitely recommend it! The yoghurt makes this deliciously moist and light, and they're perfect to freeze as well.
PS Charlie's Fruit Market has bananas on special this week :-)
Ingredients (makes 40 mini-muffins)
1 cup self-raising flour
1/2 cup wholemeal self-raising flour
1/2 cup Stevia Sweet granules or brown sugar
1 cup reduced-fat plain Greek-style yoghurt
1/2 cup mashed banana (see note)
1/4 cup extra-light olive oil
1 egg
1 cup frozen blueberries
1 cup white chocolate bits (optional)
Method
Preheat oven to 190°C/170°C fan-forced. Grease three 12-hole, 1 1/2 tablespoon-capacity mini muffin pans.
Combine flours and stevia together in a bowl. Whisk yoghurt, banana, oil and egg together in a jug. Add to flour mixture. Stir until just combined. Fold through blueberries and chocolate, if using. Spoon mixture into prepared pan holes.
Bake for 12 minutes or until light golden and cakes spring back when lightly pressed. Stand in pan for 5 minutes. Transfer to a wire rack to cool. Serve.
Tuesday, March 19, 2013
Sweet & Sour Chicken
I found this recipe in the latest Coles Baby & Toddler Club Magazine and knew it would be perfect packed with fresh vegetables from Charlie's - and it was! The whole family will love the sweetness of this dish, which is packed with goodness and flavour. I kept the calories down by having it without any added rice, but did sprinkle on some cashews for a bit of texture. I made a few changes - using chicken instead of pork and omitting water chestnuts, but you could definitely make it to your own liking. Give it a try!
Ingredients (serves 4)
olive oil spray
400g chicken breast, thinly sliced
1 medium red onion, cut into think wedges
1/2 small pineapple, peeled, cored, cut into 2cm pieces
1/2 medium green capsicum, chopped
1/2 medium red capsicum, chopped
1 tbsp cornflour
1/4 cup white vinegar
1 tbsp soy sauce
1/3 cup tomato sauce
3/4 cup chicken stock
1/2 cup unsalted cashews
Method
Heat half the oil in a large saucepan or wok over high heat. Cook chicken, in batches, for 2 minutes or until browned all over. Remove from pan.
Heat remaining oil in same pan over medium-high heat. Cook onion and pineapple for 3 minutes or until starting to soften. Add capsicum. Cook for 3 minutes or until vegetables are just tender.
Meanwhile, place cornflour, vinegar, sauces and stock in a medium jug. Stir to combine. Add chicken and vinegar mix to pan. Simmer for 2 minutes or until thickened. Top with cashews and serve with rice or noodles, if desired.
Method
Heat half the oil in a large saucepan or wok over high heat. Cook chicken, in batches, for 2 minutes or until browned all over. Remove from pan.
Heat remaining oil in same pan over medium-high heat. Cook onion and pineapple for 3 minutes or until starting to soften. Add capsicum. Cook for 3 minutes or until vegetables are just tender.
Meanwhile, place cornflour, vinegar, sauces and stock in a medium jug. Stir to combine. Add chicken and vinegar mix to pan. Simmer for 2 minutes or until thickened. Top with cashews and serve with rice or noodles, if desired.
Monday, March 18, 2013
Bean, Corn & Avocado Salad
Weeknight dinners don't get much easier or healthier than this! I adapted it from a Women's Weekly recipe, adding rice to make it a meal, rather than a side salad. It's tasty and simple, you'll love it!
Get all your fresh ingredients from Charlie's Fruit Market!
Ingredients
400g cannellini beans OR 5 bean mix, rinsed & drained
2 cobs of corn, grilled, kernels removed OR 400g can corn kernels, rinsed & drained
2 celery stalks, trimmed & chopped
100g chargrilled capsicum, chopped
1 large avocado, chopped
1 cup cooked rice
1 tablespoon lemon juice
1 tablespoon red wine vinegar
Method
Put all ingredients in a bowl and toss to combine.
Wednesday, March 13, 2013
Mexican Chicken Layer Bake
Meals don't get much easier than this! It's simple, tasty and even low-calorie - you'll love it!
Ingredients (serves 6 - 264 calories)
3/4 cup white rice (uncooked)
1/2 can corn kernels
300g barbecue chicken
1 jar salsa
100g grated cheese
Method
Cook rice according to packet.
Spread rice on the bottom of a medium casserole dish. Top with corn, then chicken, then salsa, then cheese.
Cook in a moderate oven for about 30 minutes, until cheese is golden.
Tuesday, March 12, 2013
Lentil Bolognese
Cheap, easy, healthy, family-friendly, tasty - yep, ticks all the boxes! A twist on your usual bol :-)
Ingredients (serves 4 - 160 calories per serve)
olive oil spray
1 medium brown onion, chopped
1 clove garlic, crushed
1 tablespoon tomato paste
1/2 head broccoli, finely chopped
2 small zucchini, finely chopped or grated
1 carrot, grated
400g tin lentils
400g tin lentils
400g tin crushed tomatoes
1 tablespoon dried herbs
1/2 cup beef stock
Method
Heat a medium saucepan over moderate heat. Spray with olive oil. Add onion and garlic, and cook until soft and lightly browned.
Add tomato paste and stir to combine. Stir in broccoli and zucchini, then add lentils, tomatoes, herbs and stock.
Stir well and bring to the boil, then simmer for about 30 minutes. Serve on its own or with rice or pasta and a sprinkle of Parmesan cheese.
Monday, March 11, 2013
Oat and Bran Biscuits
I made these biscuits for the kids - they are nothing "wow" but perfect for what I wanted - an alternative to plain, bought biscuits, where I can control the sugar & other nasties! They're from my Women's Weekly "1000 Best-Ever Recipes" book. Another batch of these I added some finely chopped dried apricot and cut back on the sugar, and that worked well too.
Ingredients
1 cup plain flour
1 cup unprocessed bran
3/4 cup rolled oats
1/2 teaspoon bicarbonate of soda
60g butter, chopped
1/2 cup caster sugar
1 egg
2 tablespoons water (approx)
Method
Process flour, bran, oats, soda and butter until crumbly; add sugar, egg and enough of the water to make a firm dough. Knead on floured surface until smooth; cover, refrigerate 30 minutes.
Preheat oven to 180 degrees celsius/160 fan-forced. Grease oven trays; line with baking paper.
Divide dough in half; roll each half between sheets of baking paper to about 5mm thickness. Cut dough into 7cm rounds; place on trays 2cm apart.
Bake biscuits about 15 minutes. Stand on tray 5 minutes; transfer to wire rack to cool.
Chewy raisin and oat biscuits
Ingredients
1 cup raisins
1 cup cornflakes
3/4 cup rolled oats
1/2 cup self-raising flour
1/2 cup wholemeal self-raising flour
1/4 cup brown sugar
1/4 cup olive oil
1 egg
Method
Preheat oven to 200°C/180°C fan-forced. Line a baking tray with baking paper.
Combine raisins, cornflakes, oats, flours and sugar in a bowl. Whisk oil, egg and 1/4 cup cold water together in a jug. Stir into raisin mixture.
Using floured hands, roll 2 tablespoons of mixture at a time into balls. Place balls, 3cm apart, on prepared tray. Flatten slightly. Bake for 12 to 14 minutes or until golden. Cool on tray. Serve.
Friday, March 8, 2013
Chocolate Crackles
A favourite with the kids - as you can see, a perfect addition to my little Miss's tea party! (Recipe taken from the packet of Kellogg's Rice Bubbles) :-)
Ingredients
4 cups Kellogg's Rice Bubbles
1 cup icing sugar
1 cup desiccated coconut
3 Tbsp cocoa
250g copha, chopped
Directions
In a large bowl, mix the Kellogg's Rice Bubbles, icing sugar, cocoa & coconut. Slowly melt the copha® in a saucepan over a low heat. Allow to cool slightly. Add to Rice Bubbles mixture, stirring until well combined. Spoon mixture into paper patty cases and refrigerate until firm.
Thursday, March 7, 2013
Gluten-Free & Dairy-Free Banana & Cranberry Bread
Ingredients
125g Nuttelex spread
3/4 cup caster sugar
2 eggs, lightly beaten
1 cup mashed ripe banana
1/2 cup dried cranberries, chopped
3/4 cup gluten-free self-raising flour
1/4 cup gluten-free plain flour
1/4 cup rice flour
1/2 teaspoon bicarbonate of soda
Method
Preheat oven to 180°C/ 160°C fan-forced. Lightly grease a 6cm-deep, 9cm x 19cm (base) loaf pan. Line with baking paper, allowing 2cm overhang at long ends.
Using an electric mixer, beat spread and sugar for 1 minute or until pale and creamy. Add eggs, 1 at a time, beating well until just combined.
Add banana and cranberries. Stir to combine. Sift flours and bicarbonate of soda over mixture. Stir until just combined. Spread mixture into prepared pan. Bake for 1 hour or until a skewer inserted in centre comes out clean. Cool in pan for 5 minutes. Turn out onto a wire rack to cool. Serve.
Monday, March 4, 2013
Cinnamon Afternoon Tea Cake
Here's a recipe from Stay at Home Mum, which is perfect for an afternoon tea (as the name suggests!) It freezes well, so is a handy one to keep in the freezer.
Ingredients
1 tablespoon of butter
½ cup sugar
1 egg, beaten
½ cup milk
Few drops of vanilla essence
Pinch of salt
1 cup of plain flour
1 teaspoon baking powder
1 teaspoon of ground cinnamon
1 teaspoon sugar
1 teaspoon desiccated coconut
Butter to spread over the top of cake
Method
Preheat oven to 180 degrees. Cream the butter and sugar together in a bowl, the beaten egg, milk, vanilla essence and pinch of salt, mix until all combined. Sift in flour and baking powder and mix well.
Pour batter into a round greased cake tin and cook in oven for 25 to 30 minutes, until the skewer comes out clean. Take out of oven and turn over, cover the top with butter. Combine ground cinnamon, sugar and coconut and sprinkle over mixture.
Subscribe to:
Posts (Atom)