I have put a teaser on the Mums in the Kitchen Facebook page about some changes I've been making in the kitchen - and I really can't wait to share them with you!
But FIRST, I was scrolling through some photos and realised I never shared with you my best and proudest mummy cake-making achievement ever! My little Miss Hope turned 3 back in February and requested a Castle Cake (with an angel on it). I had SOOOO much fun looking at ideas and researching and creating...and here's the finished product!
I have to say I was pretty impressed with it - not just because it's pink and sparkly and gorgeous - but because it was also really easy! So here it is step-by-step...
Ingredients
1 x 20cm square cake of choice (I used the butter cake from the Women's Weekly Birthday Cake Book)
5 ice-cream cones
1 jam roll
1 packet pink musk sticks
1 packet pink sprinkles (I used "Fairy 5s" which gave me a few different types)
1 packet marshmallows
2 quantities butter cream icing
pink and green food colouring
Method
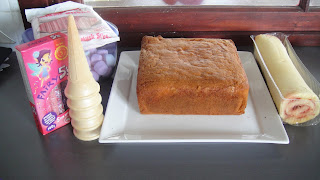
Gather your supplies.
Slice the jam roll - you will need 4 slices about 3cm thick and 1 slice about 10cm thick.
Position jam roll and upside down ice-cream cones on cake.
Tint 3/4 of buttercream pink. Ice cake and cones with pink. Use a smear of icing to secure jam roll onto cake. To decorate cones: spread icing over cone (hold it on the inside so you cover the whole cone), then put sprinkles on immediately (do it over a plate and re-use the dropped sprinkles).
Position everything in place.
Use musk sticks and marshmallows to decorate castle. Pipe rosettes around the cones and castle. Use some plain buttercream to pipe a door and window at the front.
Tint remaining buttercream green and pipe rosettes around the castle and a pathway to the door. Use a small, plain nozzle to pipe vines on the castle.
Make "trees" by sticking marshmallows on top of musk sticks, then positioning with icing.
Use little flags on toothpicks (I found some at a $2 shop) and put one on the tip of each cone.
Your princess will love it!


No comments:
Post a Comment